Building a Honeypot
I built a Honeypot on my Raspberry Pi Pico W during my winter break and I’ve been dying to talk about it.
In this post I’m going to share the building process, all the planning, everything I learnt, and my finished product.
Quick ethical and legal note regarding this project. It involves logging email addresses and MAC addresses, and posing as a real network even though it’s not. I built this for educational purposes only, and tested it within a controlled environment with my own devices.
What is a honeypot?
A honeypot is a computer security mechanism set up to detect, deflect, or sometimes counteract unauthorized use of systems.
Now there are also types of malicious honeypots that are set up with the goal of tricking users into connecting to it and possibly steal data or monitor communications.
There are a handful of different types within these two categories, however, for my project I built one more closely resembling an Evil Twin.
An Evil Twin is a fraudulent WiFi access point that appears to be legit but is set up to eavesdrop and even possibly steal info.
My Idea and Plan
Using my Raspberry Pi Pico W, I wanted to build a honeypot from scratch in micro-python.
I planned to set it up as a WiFi access point, with no actual connection to the internet, posing as a legitimate network.
Then it would log any connections, tracking MAC addresses. As well as hosting a fake captive portal that also tracked connections and form submissions.
Lastly I was hoping to use a Discord webhook for notifications, not something that would typically be seen but could be an interesting addition.
I outlined a project skeleton and steps for my initial plan, then adjusted both as necessary while building the honeypot.
Project Skeleton
| File | Reason |
|---|---|
| Main Script | entry point |
| Config Script | SSID, webhook, and any other settings |
| WiFi AP Script | access point setup |
| Captive Portal Script | http server and pages |
| Portal HTML | HTML code used by the captive portal |
| HTML Form and Pages | initial form and success page |
| Logger Script | event logging |
| Background Script | combination of the dns hijacking and connection monitoring |
| DNS Hijacking | redirect users to the web server form |
| Connection Monitoring | monitor devices connecting to the AP and log to the terminal |
Project Steps
- Get AP mode working and connecting some devices to it
- Start a server and test visiting it
Setup Discord webhook and confirm the alerts work- Improve the captive portal and make final adjustments
Note - there was something I had outlined initially that I later found out while building that it wouldn’t be possible, so I still included it above but crossed it out and will be discussing further in the Challenges I Faced section.
Throughout building the above, I also tracked everything I was doing and learning in one document to return to later.
What I Built
The following section includes all the finalized scripts I created and used for this project. Some include comments with explanations, and others have a little blurb before it.
The script that was setup to run once the Pico W was plugged in and called majority of the other files was the Main script:
# main.py
def run():
    from Honeypot.wifi_ap import startAP
    from Honeypot.config import SSID, SECURITY
    from Honeypot.portal import startServer
    from Honeypot.background import backgroundTask

    import time
    import _thread

    with open("log.txt", "w") as f:
        f.write("")

    ap = startAP(SSID, SECURITY)     # call for the ap to start
    _thread.start_new_thread(backgroundTask, (ap,))

    startServer()
Then there is the Configuration script which held majority of the variables required for the honeypot setup:
# config.py
SSID = "Free WiFi"
SECURITY = 0

AP_IP = "192.168.4.1"
HTTP = 80

ALERT_RATE_LIMIT = 30
Now during the initial building of this project I actually focused on a few other scripts first.
Each of the scripts were written to follow the steps I had given myself before creating Main and Config to test all of them alongside one another.
The first script I focused on building was the WiFi Access Point:
# wifi_ap.py
import network

def startAP(ssid, sec_lvl):
    ap = network.WLAN(network.AP_IF)            # create WLAN network interface object - access point
    ap.config(essid=ssid, security=sec_lvl)     # configure ssid and set security to 0 so it's open
    ap.active(True)                             # set the AP to active

    print("AP active:", ap.config('ssid'), "at", ap.ifconfig()[0])  # print out the ssid of the AP
    return ap
From there I built the Portal script which hosted the server and used an HTML form and fake success page:
# portal.py
import socket
from Honeypot.config import ALERT_RATE_LIMIT
from Honeypot.log import log

def loadHTML(file):
    with open(file, "r") as f:
        return(f.read())

formHTML = loadHTML("Honeypot/portalForm.html")
successHTML = loadHTML("Honeypot/portalSuccess.html")

def respond(HTML):
    return (
       "HTTP/1.1 200 OK\r\n"
       "Content-Type: text/html\r\n"
       "Connection: close\r\n\r\n"
        + HTML
    ).encode()

def parseHTTP(data, con):
    text = data.decode()

    headers, _, rest = text.partition("\r\n\r\n")
    lines = headers.split("\r\n")

    method, path, _ = lines[0].split(" ")

    content_length = 0
    for h in lines[1:]:
        if h.lower().startswith("content-length"):
            content_length = int(h.split(":")[1].strip())

    body = rest
    while len(body) < content_length:
        body += con.recv(512).decode()
    return method, path, body

def parseForm(body):
    fields = {}
    for pair in body.split("&"):
        if "=" in pair:
            k, v = pair.split("=", 1)
            fields[k] = v.replace("+", " ")
    return fields

def receive(con):
    data = b""
    while b"\r\n\r\n" not in data:
        chunk = con.recv(512)
        if not chunk:
            break
        data += chunk
    return data

def startServer():
    s = socket.socket()
    s.bind(("0.0.0.0", 80))
    s.listen(1)

    print("Portal running")

    while True:
        con, addr = s.accept()
        src_ip = addr[0]

        data = receive(con)
        method, path, body = parseHTTP(data, con)

        if method:
            log("HTTP", src_ip, f"{method} {path}")

        if method == "POST":
            if body:
                form = parseForm(body)
                log("FORM_SUBMIT", src_ip, form)
            con.send(respond(successHTML))
        else:
            con.send(respond(formHTML))

        con.close()
I had a very basic page to start and initially test connections and logging, but then I made both look a little prettier and more legit once I got it working.
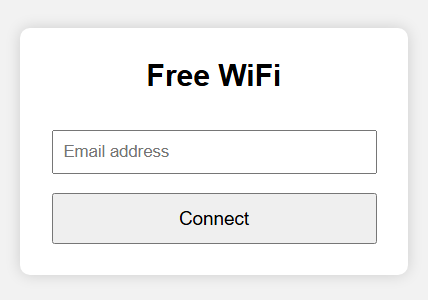
For the server, I created a Portal Form page that requested the person’s email for “connection”:
<!DOCTYPE html>
<html>
<head>
    <title>Free WiFi</title>
    <meta name="viewport" content="width=device-width, initial-scale=1">
    <style>
        body {
            font-family: Arial, sans-serif;
            background-color: #f2f2f2;
            margin: 0;
        }
        .container {
            height: 100vh;
            display: flex;
            align-items: center;
            justify-content: center;
        }
        .box {
            background: white;
            padding: 25px;
            width: 260px;
            border-radius: 8px;
            box-shadow: 0 0 12px rgba(0,0,0,0.15);
            text-align: center;
        }
        h2 {
            margin-top: 0;
        }
        input {
            width: 100%;
            padding: 8px;
            margin-top: 10px;
            box-sizing: border-box;
        }
        button {
            width: 100%;
            padding: 10px;
            margin-top: 15px;
            font-size: 15px;
        }
    </style>
</head>
<body>
    <div class="container">
        <div class="box">
            <h2>Free WiFi</h2>
            <form method="POST">
                <input type="email" name="email" placeholder="Email address" required>
                <button type="submit">Connect</button>
            </form>
        </div>
    </div>
</body>
</html>
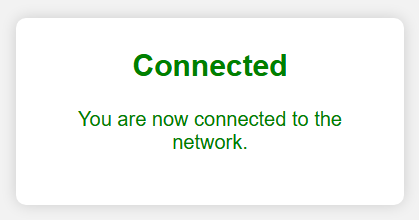
Once the user “successfully connected”, they would get redirected to a Success page:
<!DOCTYPE html>
<html>
<head>
    <title>Connected</title>
    <meta name="viewport" content="width=device-width, initial-scale=1">
    <style>
        body {
            font-family: Arial, sans-serif;
            background-color: #f2f2f2;
            margin: 0;
        }
        .container {
            height: 100vh;
            display: flex;
            align-items: center;
            justify-content: center;
        }
        .box {
            background: white;
            padding: 25px;
            width: 260px;
            border-radius: 8px;
            box-shadow: 0 0 12px rgba(0,0,0,0.15);
            text-align: center;
            color: green;
        }
        h2 {
            margin-top: 0;
        }
    </style>
</head>
<body>
    <div class="container">
        <div class="box">
            <h2>Connected</h2>
            <p>You are now connected to the network.</p>
        </div>
    </div>
</body>
</html>
Once I had the basics of the portal working, I built the Log script which would write connections and form submissions to the terminal and a file:
# log.py
import time

def log(event, src=None, extra=None):
    ts = time.time()
    print(f"[{ts}] {event} {src or ''} {extra or ''}")

    with open("log.txt", "a") as f:
        f.write(f"[{ts}] {event} {src or ''} {extra or ''}\n")
My initial output around this point was looking like the following:
AP active: Printer Setup at 192.168.4.1
Portal running
[1766262376] HTTP 192.168.4.16 GET /
[1766262382] HTTP 192.168.4.16 POST /
[1766262382] FORM_SUBMIT 192.168.4.16 {'email': 'Testing'}
Initially after this point I was done, I did almost everything I was hoping to do. But once I was running everything together, there were a few things I wanted to try correcting or forcing with a script.
I didn’t like the fact that I could only tell if someone connected to it once they accessed the server, so I made a script to track any connections to the AP itself.
Then I also noticed that there was no pop-up for the captive portal like you would typically see when connecting to a network, so I made another script that would attempt to redirect any web requests to the captive portal - this is called DNS hijacking.
I also learnt during the creation of both of those scripts that you can’t setup more than one thread on the Pico W, so I combined them into one Background script to still be able to run both:
# background.py
import time
import socket

AP_IP = "192.168.4.1"

def backgroundTask(ap):
    dns = socket.socket(socket.AF_INET, socket.SOCK_DGRAM)
    dns.bind(("0.0.0.0", 53))
    dns.settimeout(0.1)

    print("DNS hijack running")

    known = set()
    last_station_check = 0

    while True:
        # ---------------- DNS hijack ----------------
        try:
            data, addr = dns.recvfrom(512)

            tid = data[:2]
            flags = b"\x81\x80"
            counts = b"\x00\x01\x00\x01\x00\x00\x00\x00"
            header = tid + flags + counts

            question = data[12:]

            answer = (
                b"\xc0\x0c"
                b"\x00\x01"
                b"\x00\x01"
                b"\x00\x00\x00\x3c"
                b"\x00\x04"
                + bytes(map(int, AP_IP.split(".")))
            )

            dns.sendto(header + question + answer, addr)

        except OSError:
            pass  # no DNS packet received

        # ------------- station monitoring -------------
        now = time.time()
        if now - last_station_check > 5:
            last_station_check = now
            try:
                stations = ap.status("stations")
            except:
                stations = None

            if isinstance(stations, dict):
                macs = stations.keys()
            elif isinstance(stations, list):
                macs = [s[0] if isinstance(s, tuple) else s for s in stations]
            else:
                macs = []

            for mac in macs:
                if mac not in known:
                    known.add(mac)
                    mac_str = ":".join("{:02x}".format(b) for b in mac)
                    print("New device connected:", mac_str)

        time.sleep(0.01)
Once I had the above running, the output began looking like the following:
AP active: Free WiFi at 192.168.4.1
Portal running
DNS hijack running
[1766768497] New device connected: [-- mac address 1 --]
[1766768509] HTTP 192.168.4.16 GET /
[1766768511] HTTP 192.168.4.16 GET /
[1766768523] HTTP 192.168.4.16 POST /
[1766768523] FORM_SUBMIT 192.168.4.16 {'email': 'Test'}
[CYW43] do_ioctl(0, 262, 13): timeout
[CYW43] do_ioctl(0, 262, 13): timeout
[1766768563] New device connected: [-- mac address 2 --]
[1766768587] HTTP 192.168.4.17 GET /
[1766768605] HTTP 192.168.4.17 POST /
[1766768605] FORM_SUBMIT 192.168.4.17 {'email': 'Test again'}
[CYW43] do_ioctl(0, 262, 13): timeout
[CYW43] do_ioctl(0, 262, 13): timeout
I was even able to get two devices connected to it and was getting way less timeouts.
From here I was pretty happy with the results. It was running alright for only using a micro-controller and everything being written in python.
Challenges I Faced
There were three problems I ran into while building this.
Timeouts in the Output When Running
I briefly mentioned this towards the end of the previous section. In the end they seemed to be less but still there.
During the halfway mark however, they were extremely noticeable and the entire thing was unbearably slow.
There was something I had done during my fourth day of building which seemed to cause it to slow quite a lot. I suspect it had something to do with the HTML forms and the web-server, but during my fifth day I reverted a few of my scripts back which did help.
Multi-threading
There were lots of things I wanted to be running, which I believe did affect the overall speed of everything.
The way I got around this was by combining two things I wanted running into one file together, instead of calling another two scripts from main.
This was a simple fix, besides possibly still slowing down the Pico W, it didn’t affect much else.
Webhook Notifications
One of my initial ideas was notifications, utilizing Discord webhooks; I had never worked with them before and I thought it could be a cool addition.
However, I didn’t consider the fact that since the Pico W was already set up as an Access Point, it couldn’t also connect to the internet at the same time.
I looked into two work arounds: HTTP Relay Server and Serial-Over-USB Logging. Both were definitely possible but required lots of extra setup and some major changes to a lot of the stuff I had already built by this point.
In the future I wouldn’t mind returning to attempt one of the above again but even without notifications the rest of the project turned out as expected and worked well.
Hardware Choice
I think all of the above could have also been solved quite easily if I had used something else instead of a Pico W.
Nothing against the micro-controller, and for already having one on-hand, I didn’t want to go out of my way to get something else.
However, having worked with a Raspberry Pi 5 for another project that had a similar setup, it didn’t run into any of these challenges. If I still had access to it, I would have used that instead.
Resources I Used
I tried to keep track of every resource I used during the building process and listed them below.
- Raspberry Pi Pico W Access Point - https://www.whypi.org/raspberry-pi-pico-wifi-access-point/
- Getting Started WiFi - https://randomnerdtutorials.com/raspberry-pi-pico-w-wi-fi-micropython/
- MicroPython Libraries Network - https://docs.micropython.org/en/latest/library/network.html
- Time module MicroPython - https://docs.micropython.org/en/latest/library/time.html
- MicroPython _thread Module Doc - https://docs.micropython.org/en/latest/library/thread.html
- Python Docs _thread Module - https://docs.python.org/3.5/library/thread.html#module-thread
Conclusion
I spent about 2-3 weeks working on this project. I built a honeypot on a Raspberry Pi Pico W, which appears as a network with free WiFi, logging MAC addresses from unsuspecting users.
I set up DNS hijacking to force the users to the fake captive portal, where they’re prompted to enter their email, logging them as well before redirecting users to a fake success page.
I ran into a few challenges but found ways to work around and solve them, learning more and having a deeper understanding on how to set up something like this in the future.
I’m extremely happy with how this entire project turned out and I’m glad I finally got to share my process for it here.